Showing posts with label peppers. Show all posts

Tuesday, March 13, 2012

Pepper Seeds Won't Germinate? Some Tips.

Home gardeners who grow their tomatoes from seed usually get fairly quick results after sowing the seeds indoors. Given the right germinating conditions - a soilless planting mix, good drainage, plenty of light, plenty of warmth - tomato seeds can pop up in 8-10 days.
  
Pepper seeds are a different story. Why is it some peppers can take weeks to germinate?

"The important thing in getting your (pepper) seeds to germinate is to keep them warm – the soil temperature should be in the 80's", says Renee Shepherd of Renee's Garden, a popular seed catalog based in Felton, California. "Germination is very much related to even moisture and warm temperatures. You should see germination within 2 to 3 weeks if it's warm enough. I strongly suggest using bottom heat to achieve the warmth the seeds need – most good nurseries carry good little electric seed starting mats which will keep your seeds at the right temperature to sprout. A local mail order source is Peaceful Valley Farm Supply."
For those who want to comparison shop, another source for heating mats for your pepper seeds: Amazon.

Another trick that some gardeners employ is soaking the pepper seed for a few hours before sowing to soften the seed coat. The value of that is open to debate.

"I have never heard of soaking pepper seed overnight and have never done it in 20 years of running a trial garden,"  says Shepherd.

On the other hand, Professor Debbie Flower of the American River College Horticulture Department sees the benefits of some "immersion therapy" for pepper seeds. "We soaked our pepper seeds in hydrogen peroxide for 10 minutes," explains Flower. "That's not enough time to scarify (soften or break the seedcoat), or even get them soaked, but enough to kill exterior diseases."

Many sweet pepper varieties will show their initial leaves about two weeks after planting the seeds. But some varieties of peppers take longer to pop up than others. "The hot pepper varieties take longer to germinate, some to three weeks," says Flower.

But if you are experimenting with the really hot pepper varieties, such as the Bhut Jolokia (Ghost Pepper), it could take up to four months, says the Trade Winds Fruit website:
"Chinense species (e.g. Habanero's) generally take longer to germinate than most common peppers. Keep soil warm to very warm (75-90F) for better germination. Do not use acidic soil. Some Chinense peppers, in particular Bhut Jolokia, Naga Morich and related peppers are very slow to germinate, averaging 1-4 months germination time."

By the way, if you are growing the Bhut Jolokia...you're playing with fire. The Ghost Pepper is rated at 850,000 Scoville units of heat. For comparison, the habanero rates 200,000; the Jalapeno is 5,000; the Anaheim equals 1,000. And sweet bell peppers? 0.
This is as hot as I can stand. The Inferno: 4,000 Scoville Heat Units

Another factor that can determine the rate of germination of pepper seeds: the pH of your seed starting mix. One of the most common ingredients in most seed starting mixes is peat moss, which is highly acidic, with a pH around 4.0. Pepper heads, including the Horticulture students at American River College, have found quicker germination when Coir (coconut fiber) is substituted for peat moss. Coir has a closer-to-neutral pH: around 6.5. The tests at American River College bear this out after trying Coir in their pepper seed soil mix. "We've had the best germination of peppers ever!" says Flower.

And don't be in a rush to set them out in their permanent garden home. "Pepper seedlings need to be grown out until they have at least several sets of true leaves, and it is at least 55° at night before you plant them out," explains Renee Shepherd.  "And they will need a little time to get used to being outdoors, as well."

Here in the Sacramento area, that would be around  mid-May. Be patient.

Wednesday, February 22, 2012

Tips For Starting Your First Backyard Garden


If you're new to backyard gardening and want to start growing vegetables, 

    here are some tips:
 
Location, location, location: Give the garden a sunny spot. Pick a garden location that gets at least six hours a day of full sun. Good drainage is key. That's why raised beds are so popular (that, and the soil in raised beds warms up sooner in the spring). Make sure a source of water is nearby. And, a location that is easily seen on a regular basis from a house window (esp. the kitchen), is a good reminder of what's out there and what needs to be done.

 
Know your soil. Do a pH test (which measures the relative alkalinity or acidity of the soil), or a full soil test. One of the best bargains for a complete soil test is the University of Massachusetts. They will analyze your soil for under $20 (at this writing). They also include an interpretation of what all those measurements mean to you.


• Amending the soil with a good quality compost is a great idea, if your soil has never been amended. Rototill in a cubic yard of compost for every 300 square feet of garden. That is a rule of thumb that I follow. After the first growing year, no rototilling is necessary. Just add a few inches of compost to the top of the soil; let the winter rains work the compost in.

• Fertilize the soil. I prefer to use low-dosage organic fertilizers, such as a mix of fish emulsion and sea kelp. There are plenty of great all-in-one organic fertilizers on the market labeled for use in vegetable gardens. Be sure to follow the label directions. If using a non-organic granular fertilizer (such as a 10-10-10- formulation), put a tablespoon in the bottom of the planting hole, cover with a couple inches of soil, and water in thoroughly. Don't let the sensitive roots of the tomatoes and peppers come in direct contact with the fertilizer. If you'll be using a water soluble, non-organic fertilizer on an every-other-week or monthly basis, use half the recommended amount for this first feeding.
Oregon Spring V

Good sources of information:


The UC Davis Vegetable Research and Information Center is a good website with more garden starting info.

For California gardeners, the Farmer Fred interactive Vegetable Planting Calendar is a good guideline for when to plant. Also, clicking on the individual vegetables brings up information on how to grow it.

That's the basics! What you plant is up to you and your family's appetites. 

Read on for more detailed gardening information for the first timer:


Peppers spaced 2 feet apart. They WILL fill the bed! Trust me on that.
For tomatoes and peppers:

• Plant tomatoes deeply. Pinch off the lower leaves of the plant and bury the tomato deeply, leaving only the top four sets of leaves above ground. New roots will form along this underground, stripped section. If it's a very tall plant, dig a trench, lay the plant on its side in the trench, and bend the top section up (carefully) to stand above the soil level; fill in the trench.

Tomatoes spaced three feet apart. They also WILL FILL THE BED.


  • Give tomatoes room. Full-size tomatoes grow on vines that can reach five feet high or more. Plant them three to four feet apart. Prepare a staking system now while they're still manageable.

  • Plant peppers no deeper than the soil level of the pot it came in. Peppers can be spaced two feet apart.


Water. Don't let the soil dry out while the roots are getting established. During the warmth of summer, water tomatoes and peppers regularly, keeping the soil evenly moist. One common problem with tomatoes, blossom end rot (the bottom of the tomato turns brown and mushy), can be traced in part to irregular watering habits. Deep, infrequent waterings (once or twice a week) with drip irrigation or soaker hoses work great. An added benefit: drip systems and soaker hoses can be hooked up to a battery operated timer, watering these summertime treats while you're vacationing.
When deciding where to plant your vegetable garden, choose the best available location by keeping the following factors in mind:

When is the soil ready to plant? You may have little choice concerning the soil type available to you, but you can use a simple test to find out whether your soil is in good condition for planting. Squeeze a handful of soil to test for moisture content. If the squeezed soil forms a clump, the soil is too wet to work. If you work soil that contains this much moisture, it might form into hard, cement-like clumps, which can cause problems for the remainder of the year. If the soil crumbles easily when it is squeezed, it is in an ideal condition to work. However, if that handful of soil is bone dry, water the area thoroughly a day or two before working or planting the soil.


Broccoli in the Winter Garden
 The Year-Round Garden. In California, there are 3 to 4 seasons, depending on your location, in which vegetables can be grown. Yet, many gardeners grow only summer crops. By planting a spring crop, a summer crop, and a fall crop, a gardener can get 3 crops from the same space.


Level ground is best for growing vegetables. It is easier to prepare, plant, and irrigate than sloping ground. If you must plant on sloping ground, run rows across the slope, not up and down, to keep the soil from washing away during irrigation.


Preparing a Garden Plan
It is best to plan on paper before planting your garden. A well-planned garden can provide fresh or preserved vegetables for use all year.  


Plant perennial crops, such as rhubarb and asparagus, to one side of the garden so that the plants are not disturbed by preparations for future crops. Plant tall crops, such as corn and pole beans, on the north side of the garden so that they will not shade low-growing crops.


Trellising and staking. Do not grow horizontally what you can grow vertically. Twining crops, such as tomato, squash, cucumber, and pole beans, use a great deal of space when allowed to grow along the ground. Trellises, stakes, or other supports minimize the ground space used and increase garden productivity. Support materials can consist of wood, extra stakes, twine, or a nearby fence.


For the beginning vegetable gardener, choose more hybrid seeds than heirlooms. Hybrid vegetables are bred to have more disease and pest resistance, as well as larger yields. Heirloom varieties have more unique shapes and flavors, but can be problematic for the first time gardener. Sure, buy some heirlooms for the flavor; but for your first garden, plant mostly hybrids. After that, you may prefer the flavor of the heirlooms. I still plant a mix of both.

Succession planting consists of sowing seeds of a given crop at 1- to 2-week intervals to produce a continuous supply of vegetables. Corn, beans, lettuce, turnips, and beets are well suited to this practice.

Intercropping involves planting early-maturing crops between the rows of late-maturing crops to increase production in a small area. For example, beans, radishes, green onions, spinach, or leaf lettuce may be planted between rows of tomatoes, peppers, cabbage, or corn. The quicker-maturing crops will be harvested before the others become very large.


What to Plant
Plant enough of each vegetable crop to meet your family's needs for fresh, stored, and preserved supplies. When choosing vegetable varieties or hybrids, consider such factors as disease resistance, maturity date, compactness of plant, and the size, shape, and color of the vegetable desired. Refer to the individual vegetable links on the Farmer Fred Interactive Vegetable Planting Calendar for variety recommendations.


Tools
You only need a few, good quality tools for a small home garden:


Trowel. One of the handiest garden gadgets, it is useful for transplanting and for loosening soil around plants.

Shovel. Use a round-edged shovel for digging.
  
Spade or spading fork. Use to turn the ground, to turn under organic matter, and to break up large clumps of soil.


Rake. Use to smooth out the soil after spading and after preparing the seedbed. You can also use it for clearing up rubbish and removing small weeds.

Hoe. Use to remove tough weeds and to cover seeds after planting. When turned sideways, you can also use a hoe to dig a V-shaped row for planting.


Following these simple guidelines will keep your tools in good condition:


Clean tools after each use. A putty knife, jet nozzle on a hose or a wire brush is good for scraping off dirt. If tools get rusty, soak them in kerosene for a few hours, then use a wire brush or fine sand to scrub off the rust. Oil them with a light lubricant after cleaning.


Keep cutting tools sharp. The basic sharpening tool for hoes, pruners and shovels is an 8" mill file.
 

Keep tools in a dry place to prevent rust.

Friday, January 21, 2011

Starting Tomato, Pepper Seeds Indoors


Every summer, I make the same promise to myself: "Next year, fewer tomato and pepper plants!" And every winter around this time, I try to start small. But somehow, things get out of control...

Late January and early February is the ideal time here in Northern California for starting tomato and pepper seeds indoors. And while you're at it, why not start a few others, such as more cool season leaf crops and summer annual flowers from seed. Those leaf crops (lettuce, spinach, chard) can be transplanted outdoors after about three weeks worth of growth indoors (take a few days to gradually introduce them to the outdoors, perhaps bringing them and their containers back in at night).

Those tomato and pepper plants, along with the summer flowers you started from seed? Keep them protected, indoors, until mid-April. Then, gradually acclimate them to the outdoors as well.

The main problem with outdoor planting of tomato and pepper plants this time of year? Soil temperature. Those summer vegetables do not start actively growing until soil temps reach the mid-60's, and don't really take off with food production until soil temperatures are above 70. Right now? Soil temperatures are hovering around 50 degrees here in the Sacramento area.

Another good reason to delay outdoor planting of those young vegetables until late April-early May: the wind. March is a very windy month in the Central Valley, with northerly winds hitting 20-30 miles per hour, for several days.

What you need to start your seeds:
• A sunny, indoor window or greenhouse.
• Small pots or flats with good drainage. Clean thoroughly.
• An easy draining, pathogen-free soil mix, preferably soilless.
• No greenhouse? Use good quality light fixtures.
• Air movement.
• Small amounts of fertilizer.
• Seed heating mat (optional).

If you are starting your seeds indoors, you would benefit from an extra lighting system, such as fluorescent bulbs hung a few inches above the plants. If the light source is too far away, the plants will get leggy.

I like to use 3"- 4" azalea pots for starting seeds of tomatoes and peppers. I will plant three or four seeds per pot. When they come up and put on two sets of leaves (about three weeks after germination), I'll transplant them to their own pot.

(NOTE: this is how a small number of plants becomes wayyyyy too many, in a hurry!).
Those old six packs and partitioned flats are ideal for starting green, leafy crops. Thin out the seedlings so that there is only one remaining in each cell.


The real key to seed starting success? The soil. More exactly, the soilless mix. Using soil from your garden to start seeds is filled with threats to seed survival: competition from weed seeds, soil-borne diseases, and too heavy a soil. Damping off, a common malady of new seedlings, is due to cool, wet, heavy soil, a perfect environment for pathogens, especially pythium.

Using a soilless mix to start seeds helps avoid introduction of those pathogens. You can purchase bags of "Seed Starting Mix" at your favorite nursery. 


Or, make your own. The recipe I use:


4 parts well aged compost
2 parts peat moss or coir (be sure to thoroughly moisten the peat moss first)
1 part perlite (aids drainage)


If you are worried that the mix you are using is too heavy, you can help your seeds get off to a good start with bottom heat, via a seed heating mat. These are especially useful for germinating pepper seeds, which need higher temperatures to germinate.


Put the seed starting mix in each pot or flat, and then thoroughly soak it. Although it isn't necessary for starting seeds, you can add a diluted liquid fertilizer at this time. I tend to use fish emulsion (5-1-1 NPK) and a sea kelp product, which promotes root production. Generally, there is no need to fertilize until the seed has produced two sets of true leaves. 

"True Leaves" look like the finished product. The first two leaves that emerge from a seed are usually oval shaped cotyledons, which are embryonic leaves.

The seeds are planted just below the soil surface in each pot, no more than a half inch deep.

Once the seeds are up and growing, introduce some air movement into the room, such as a house fan. This helps the new plants avoid diseases. And, air movement can help strengthen tomato stems, according to Debbie Flower, professor of horticulture at American River College, where they use fans in their greenhouses, for up to 16 hours a day.

Coming in March: those containers of tomato and pepper starts will easily become many more containers of tomato and pepper plants, after separating out the three or four starts per container.

Yep, another year of too much.

Saturday, October 9, 2010

Too Many Peppers? Try This Relish Recipe

Here in Northern California, sweet peppers continue to ripen on the plants in early October, turning rich shades of red, purple, and yellow. The result? Peppers that are sweeter. And probably more peppers than you know what to do with. And if your onion harvest was overabundant this summer (as ours is every year), why not combine the two for a real taste treat?


We spend this time of year making several batches of sweet red pepper relish, using a recipe we found in an old copy of Sunset's Home Canning book.


It's delicious on many dishes, including as a topping for hot dogs and hamburgers...or just dolloped onto a cracker. It's the one homemade holiday gift that we distribute each December that our friends and family actually request!


The recipe for Sweet Red Pepper Relish:
6 pounds of sweet red peppers, seeded and cut into one-inch squares (we throw in a few Anaheim peppers for a touch of heat)
3 pounds onions, cut into one-inch chunks
4 cups distilled white vinegar
3 cups sugar
2 Tbs canning salt or noniodized table salt
1 Tbs mustard seeds

Chop the peppers and onions, then put in a food processor or food chopper with a medium blade. 
Pour chopped peppers and onions into a heavy-bottomed, 8-10 quart stainless steel or unchipped enamel pan. 
Mix in the vinegar, sugar, salt and mustard seed.
Bring to a boil over medium-high heat, stirring occasionally.
Reduce heat to medium-low and let it boil gently, uncovered.
Stir often to prevent sticking.
Cook about 50 minutes, until relish is thickened but still juicy.
Makes about 7 pints.
A quarter-cup serving has 81 calories, 1 g protein, 16 g carbohydrates, 2 g total fat, 0 mg cholesterol, 3 mg sodium

Storage:
Unprocessed: Ladle into pint jars or refrigerator containers, leaving a half-inch head space. Apply lids, let cool, then refrigerate. Refrigerator life: 1 month.

or

Processed: Ladle hot relish into clean, hot pint jars, leaving a half-inch headspace.
Run a narrow nonmetallic spatula between relish and jar sides to release air bubbles.
Wipe rims and threads clean. Top with hot lids, then firmly screw on bands.
Process in boiling water canner for 15 minutes. Shelf life: up to 1 year.


Thursday, September 9, 2010

After the Harvest, Where Do You Store It?


This time of year, no one walks in from the garden without a handful (or bucketful) of fresh fruits and vegetables. Usually, they end up next to the kitchen sink.

Stockton Red Onions

For those just-picked fruits and vegetables to last the longest, where should you put them? On the counter? The refrigerator? Both?

The University of California Agriculture and Natural Resources publishes the pamphlet, "From the Farm to Your Table: A Consumer's Guide to Fresh Fruits and Vegetables".   


It includes this information on proper storage of fresh fruits and vegetables at home, either from the garden or the grocery store:


Store on Counter at Room Temperature: apples (for less than 7 days), bananas, grapefruit, lemons, limes, mandarins, mangoes, melons, oranges, papayas, persimmons, pineapple, plantain, pomegranates, watermelons, basil (in water), cucumbers (refrigerator is OK for 1 to 3 days), dry onions (well ventilated), eggplant (refrigerator OK for 1 to 3 days), garlic (well ventilated), ginger, jicama, peppers (refrigerator OK for 1 to 3 days), potatoes (well ventilated), pumpkins, sweet potatoes, tomatoes, winter squash.

Ripen on Counter, Then Store in Refrigerator - avocadoes, kiwifruit, nectarines, peaches, pears, plums, plumcots (and I would imagine pluots would be in this category).

Asian Pears
Store in Refrigerator - apples, apricots, Asian pears, blackberries, blueberries, cherries, cut fruits, figs, grapes, raspberries, strawberries, artichokes, asparagus, green beans, beets, Belgian endive, broccoli, Brussels sprouts, cabbage, carrots, cauliflower, celery, cut vegetables, green onions, herbs (not basil), leafy greens, leeks, lettuce, mushrooms, peas, radishes, spinach, sprouts, summer squashes, and sweet corn.

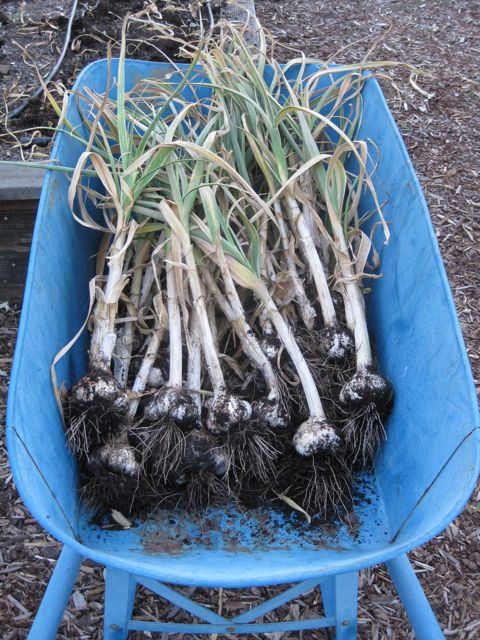
California Early Garlic