Thursday, April 22, 2010

Gardener, Beware!


It's a nice spring Saturday. You decide to do a little shopping, perhaps picking something up for the garden. Off you go to the big box store, the local nursery or (gulp!) the local drugstore or supermarket (which, you may have noticed lately, has that alluring display of colorful annuals and vegetables outside the front door).

You got everything together so you can get out of the driveway...keys, credit, cash, a coffee. Um, wait a minute, before you leave the house...
Do you have any frickin' idea what you are going to buy? No?
You, then, will be crowned "Garden Customer of the Day" wherever you shop. That's because you'll be impulse buying, spending more money on plants that may or may not be right for you and your yard.
But this rant isn't about your shopaholic ways. Another day for that (hint: survey the yard for your needs; make a list or garden plan; stick to it).
No, this rant is about something every gardener should carry in their car and grab it when they walk into a nursery section: a good plant reference book.

Western Garden Book: More than 8,000 Plants - The Right Plants for Your Climate - Tips from Western Garden Experts (Sunset Western Garden Book)Here in California, it's hard to beat the Sunset Western Garden Book for that purpose.

Updating your old Sunset Western Garden Book? Fine. Put the old one in the car trunk.


The Southern Living Garden Book: Completely Revised, All-New EditionElsewhere in the country, good references include the Southern Living Garden Book.


Also, look for the Northeastern Garden Book or the National Garden Book (if you can still find them!)


Northeastern Garden Book
Sunset National Garden Book
Why approach a place of business that's selling plants with such a reference book?

 Here are three, early spring shopping scenarios that, unfortunately, are too common that may fool unsuspecting gardeners:


Summer vs. Winter: Marigolds next to Violas
1) an eye-catching rack of annuals and vegetables outside the front door of supermarkets and drugstores. Those plants may be there either a) too late in the season; b) too early in the season; or, c) mixed together so that you can't tell whether they are cool season or warm season annuals.


2) mismarked signs.
Azaleas? How about...an invasive Scotch Broom!


Thanks to eagle-eye Trey Pitzenberger for spotting this!


3) mismarked pots.

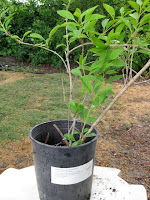
Forsythia (6' tall) in a can marked...
Iberis (6" tall)


In all of these instances, a good reference book while plant shopping can help you answer such questions as:
• Is the plant I am looking at REALLY that plant? (compare it to the plant description in the book).
• When is the best growing season for this plant?
• Do I really want this particular variety of plant? (For example, a Beefmaster tomato can offer up large slicing tomatoes all summer; a Roma tomato, though, tends to set smaller fruit all at once which makes it ideal for canning purposes)
• Do I have the right spot in my yard for this plant: Does it require sun or shade? Quick draining soil? Lots of water or little water? Acid soil? Are any of its parts poisonous?

I realize that "sticking to a garden plan" is, well...challenging, especially when you meet up with a comely beauty at a nursery. Still, arming yourself with a good reference book while nursery shopping might give you more incentive to drive home, alone. 

Too bad Sunset doesn't publish such a book for "Singles Bars" hobbyists.

Do you have a favorite plant reference book? Leave a comment!

Monday, April 19, 2010

Starting a Vegetable Garden for the First Time


If you're new to backyard gardening and want to start a garden, here are some tips:

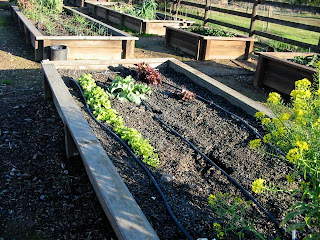
* Location, location, location: Give the garden a sunny spot. Pick a garden location that gets at least six hours a day of full sun. Good drainage is key. That's why raised beds are so popular (that, and the soil in raised beds warms up sooner in the spring). Make sure a source of water is nearby. And, a location that is easily seen on a regular basis from a house window (esp. the kitchen), is a good reminder of what's out there and what needs to be done.

* Know your soil. Do a pH test, or a full soil test. Amending the soil with a good quality compost is a great idea. Rototill in a cubic yard of compost for every 300 square feet of garden. That is a rule of thumb that I follow.

*Fertilize the soil. I prefer to use low-dosage organic fertilizers, such as a mix of fish emulsion and sea kelp. There are plenty of great all-in-one organic fertilizers on the market labeled for use in vegetable gardens. Be sure to follow the label directions. If using a non-organic granular fertilizer (such as a 12-12-12 formulation), put a tablespoon in the bottom of the planting hole, cover with a couple inches of soil, and water in thoroughly. Don't let the sensitive roots of the tomatoes and peppers come in direct contact with the fertilizer. If you'll be using a water soluble, non-organic fertilizer on an every-other-week or monthly basis, use half the recommended amount for this first feeding.


For tomatoes and peppers:

• Plant tomatoes deeply. Pinch off the lower leaves of the plant and bury the tomato deeply, leaving only the top four sets of leaves above ground. New roots will form along this underground, stripped section. If it's a very tall plant, dig a trench, lay the plant on its side in the trench, and bend the top section up (carefully) to stand above the soil level; fill in the trench.

  • Give tomatoes room. Full-size tomatoes grow on vines that can reach five feet high or more. Plant them three to four feet apart. Prepare a staking system now while they're still manageable.

  • Plant peppers no deeper than the soil level of the pot it came in. Peppers can be spaced two feet apart.

  • Water. Don't let the soil dry out while the roots are getting established. During the warmth of summer, water tomatoes and peppers regularly, keeping the soil evenly moist. One common problem with tomatoes, blossom end rot (the bottom of the tomato turns brown and mushy), can be traced in part to irregular watering habits. Deep, infrequent waterings (once or twice a week) with drip irrigation or soaker hoses work great. An added benefit: drip systems and soaker hoses can be hooked up to a battery operated timer, watering these summertime treats while you're vacationing.

Good books for learning how to start a garden include:
 

The Sunset Western Garden Book


Western Garden Edibles 


The UC Davis Vegetable Research and Information Center is a good website with more garden starting info, including:

When deciding where to plant your vegetable garden, choose the best available location by keeping the following factors in mind:

Good soil. You may have little choice concerning the soil type available to you, but you can use a simple test to find out whether your soil is in good condition for planting. Squeeze a handful of soil to test for moisture content. If the squeezed soil forms a clump, the soil is too wet to work. If you work soil that contains this much moisture, it might form into hard, cement-like clumps, which can cause problems for the remainder of the year. If the soil crumbles easily when it is squeezed, it is in an ideal condition to work. Correct tillage and the use of fertilizer and soil amendments can improve poor soil and can increase yield, even in good soil. Raised beds that contain potting soil or amended garden soil can improve production in poor soils.

Level ground is best for growing vegetables. It is easier to prepare, plant, and irrigate than sloping ground. If you must plant on sloping ground, run rows across the slope, not up and down, to keep the soil from washing away during irrigation.

Water supply.
Locate your garden near an abundant supply of water easily reached with a garden hose.

Adequate light. Vegetables need at least 8 hours of sunlight each day for best growth. Plant vegetables where they are not shaded by trees, shrubs, walls, or fences. Trees and shrubs also compete with vegetables for the water available in the soil and they attract birds which may damage young plants. Plant your garden near your home, if possible. You are more likely to spend time working in your garden if you can reach it easily. Also, a garden nearby means that you do not have to carry tools back and forth over a long distance. If your garden is large enough for you to use power tools, be sure you have easy access to a road or driveway wide enough for equipment movement.

Efficient Use of Space
The key to any successful garden is planning. Time and space cannot be wasted if the gardener is to produce large amounts of vegetables from a limited area. Gardeners should pay close attention to timing of planting and harvesting, selection of varieties, trellising, and other space-saving practices.Timing refers to the maximum use of the available growing season. In California, there are 3 to 4 seasons, depending on your location, in which vegetables can be grown. Yet, many gardeners grow only summer crops. By planting a spring crop, a summer crop, and a fall crop, a gardener can get 3 crops from the same space. This requires close rotation of crops, such as spring lettuce followed by summer green beans followed by fall spinach. The idea involves planting a cool-season crop, following it with a warm-season crop, and then finishing with another cool-season crop. Careful attention to days to maturity for each crop grown will establish the ideal rotation period.

Trellising and staking. Do not grow horizontally what you can grow vertically. Twining crops, such as tomato, squash, cucumber, and pole beans, use a great deal of space when allowed to grow along the ground. Trellises, stakes, or other supports minimize the ground space used and increase garden productivity. Support materials can consist of wood, extra stakes, twine, or a nearby fence.

Improved varieties may be the best way for the space-conscious gardener to achieve higher yields. Today, a gardener can select bush varieties of beans, cucumbers, melons and squash that require much less space than standard varieties. Determinant tomatoes (those that grow only to a certain height) can be trained more easily to a stake. Several small-fruited tomato varieties are suited to container culture on patios or other small spaces.

Succession planting consists of sowing seeds of a given crop at 1- to 2-week intervals to produce a continuous supply of vegetables. Corn, beans, lettuce, turnips, and beets are well suited to this practice.

Consider planting two crops in the same row at the same time. Normally one crop matures and is harvested before the other one. Radishes and carrots work well this way, since the radishes can be harvested well before the carrots are very large. The quick-growing radish seedlings also help to mark planted rows.

Intercropping involves planting early-maturing crops between the rows of late-maturing crops to increase production in a small area. For example, beans, radishes, green onions, spinach, or leaf lettuce may be planted between rows of tomatoes, peppers, cabbage, or corn. The quicker-maturing crops will be harvested before the others become very large.

Proper spacing between rows and within rows is extremely important. The use of power equipment will require that the distance between rows exceed the width of the equipment. Maximum production will require that you disregard standard row and plant spacings and utilize wide rows or beds for planting. For instance, seeds of many crops, such as leaf lettuce or beets, can be broadcast in a bed 1 to 3 feet across and thinned to obtain proper spacing. Other crops, such as cabbage or broccoli, can be planted closely in wide rows so that their outer leaves will touch one another when the plants are about three-fourths mature. These methods reduce space wasted as aisles, and often provide such dense shade that weed growth is inhibited and evaporation of soil moisture is reduced.
 
Raised beds are often helpful in maximizing plant growing space in a garden. They provide the advantages noted above for wide beds, Plus they can be used to optimize soil otherwise poorly suited for vegetables. Raised beds can be achieved by adding large amounts of topsoil or organic soil amendments so that a bed is established above the previous soil level. Raised beds also lend themselves well to the use of plastic mulch, furrow irrigation, and improved drainage, if needed.

What to Plant
Plant enough of each vegetable crop to meet your family's needs for fresh, stored, and preserved supplies. When choosing vegetable varieties or hybrids, consider such factors as disease resistance, maturity date, compactness of plant, and the size, shape, and color of the vegetable desired. You can contact your county Cooperative Extension farm advisor for help in selecting varieties suited to your area.


Preparing a Garden Plan
It is best to plan on paper before planting your garden. A well-planned garden can provide fresh or preserved vegetables for use all year. The plan should contain crops and amounts to be planted, dates of planting and estimated harvest, planting location for each crop specific spacing between rows, and trellising or support required. The plan will aid in buying supplies and serve as a handy guide in timing planting during the season. First, make a sketch of the garden area showing the dimensions of the garden. Prepare a list of vegetables you want to grow. Then arrange the crops in the garden according to the amounts you wish to grow, dates to be planted, and space available. Plant perennial crops, such as rhubarb and asparagus, to one side of the garden so that the plants are not disturbed by preparations for future crops. Plant tall crops, such as corn and pole beans, on the north side of the garden so that they will not shade low-growing crops.

Tools
You only need a few, good quality tools for a small home garden.
Spade or spading fork. Use to turn the ground, to turn under organic matter, and to break up large clumps of soil.
Rake. Use to smooth out the soil after spading and after preparing the seedbed. You can also use it for clearing up rubbish and removing small weeds.
Hoe. Use to remove tough weeds and to cover seeds after planting. When turned sideways, you can also use a hoe to dig a V-shaped row for planting.
Yardstick, twine, and stakes. Use to get rows evenly spaced and laid out in straight lines.
Putty knife or spatula. Either one of these items is handy for blocking out seedlings when transplanting and can also be used for cleaning tools.
Trowel. One of the handiest garden gadgets, it is useful for transplanting and for loosening soil around plants.
Dibble. This short, round, pointed stick is used to make holes for transplanting seedlings and to firm the soil around the plant roots.

Following these simple guidelines will keep your tools in good condition:
Clean tools after each use. A putty knife is good for scraping off dirt. If tools get rusty, soak them in kerosene for a few hours, then use a wire brush or fine sand to scrub off the rust.
Keep cutting tools sharp.
where you can hang them up out of the way to prevent damage to both you and to them. 

Keep tools in a dry place to prevent rust.

Friday, April 16, 2010

When? Who? What? Where? Why? How?

How to Write a Public Service Announcement Aimed at those with Attention Deficit Disorder (which includes anyone in Journalism or Broadcasting).

This rant is aimed at those of you who are attempting to get publicity for your garden events. You know who you are. You're probably a volunteer for your garden club or organization. God bless you.

As a guy who enjoys reading announcements for upcoming gardening events on the radio and likes to cut and paste them on my website, here's some advice: keep it short. By the way, newspapers like short announcements, too.

Here are a couple examples from my e-mail box. 

First, the good:

Sunday, April 25, 2:00 p.m.,
Guided Tour: Explore the Redwood Grove
Buehler Alumni and Visitors Center, Old Davis Road, UC Davis


Learn about the complex and fascinating ecosystem of the redwood forest on a free guided tour at the UC Davis Arboretum on Sunday, April 25. This walk will provide a brief introduction to the ecology and history of the coast redwood and the most common animals and plants found with the redwoods. Many of the understory plants will be in bloom. The tour will meet at 2:00 p.m. at the Buehler Alumni and Visitors Center, located on Old Davis Road at Mrak Hall Drive, across from the Mondavi Center for the Performing Arts on the UC Davis campus. There is no charge for the tour and free parking is available in Visitor Lots 1 and 2 and the Mondavi Center parking structure. For more information, please call (530) 752-4880 or visit arboretum.ucdavis.edu.

Second, the ugly:
"Master Gardeners to Host Annual Spring Plant Sale


Spring is bustin’ out all over! – And the (county deleted) Master Gardeners are celebrating this grand event by hosting their annual Spring Plant Sale on Saturday May 8 2010. The sale runs from 9 a.m. until 12 noon at the Master Gardener’s Demonstration Garden located at (address deleted). Cash and checks are accepted for payment.


A host of plants of various species and sizes will be offered including shrubs, ornamentals, vegetables, fruits, berries, annuals, and perennials.


All plants offered for sale have been propagated locally. There are numerous advantages in buying locally propagated plants including:


• less stress on the plant caused by traveling long distances from a commercial grower to market
• superior quality control because each plant was tended by a single individual during its propagation period
• Assurance that all plants were grown organically


Additionally, many of the plants offered for sale are native varieties. Not all non-native plants are bad, but many are considered to be invasive. Inclusion of numerous native plants in your garden and landscape generally provide the following benefits:


• Use less water
• Require less maintenance
• Reduce the need for pesticides
• Provide wildlife habitat
• Support local ecology


The (county deleted) County Master Gardeners are a non-profit, 501c3 group of trained volunteers, operating under the aegis of the University of California. Their mission is to:


• educate the public about sustainable organic gardening practices and  principles.
• provide consultative services to the general public regarding plant, insect, and pest identification.
• provide guidance for sensible, sound pest management and weed eradication practices.


All proceeds of this plant sale - as well as the fall plant sale, support the numerous activities of the Master Gardener program.


You’ll want to make this a must attend event on your calendar.
We look forward to meeting you and discussing gardening related issues. Local Master Gardeners will be on site to assist you with plant selection as well as to answer any questions you might have.


We hope to see you on Saturday May 8. We’ll set aside some
plants for you." 

Excuse me for a minute, while I get the Visine.
OK. 
In the do-it-in-a-hurry world of journalism, the easier you make it for those on the receiving end, the better the chance you'll get positive results. I'm willing to give you 15-30 seconds on the radio (about the length of that first example). Newspapers will limit you to one column inch. Or less.

And you can make it easy for editors, broadcasters and website managers by structuring your public service announcement using the journalistically famous "Five W's and the H", in this order:

When?
What?
Where?
Who?
Why?
How?

For example:
When? Sunday, April 25, 2 p.m.


What? Guided Tour: Explore the Redwood Grove


Where? Buehler Alumni and Visitors Center, Old Davis Road, UC Davis


Who and Why? Learn about the complex and fascinating ecosystem of the redwood forest on a free guided tour at the UC Davis Arboretum on Sunday, April 25. This walk will provide a brief introduction to the ecology and history of the coast redwood and the most common animals and plants found with the redwoods. Many of the understory plants will be in bloom. The tour will meet at 2:00 p.m. at the Buehler Alumni and Visitors Center, located on Old Davis Road at Mrak Hall Drive, across from the Mondavi Center for the Performing Arts on the UC Davis campus. There is no charge for the tour and free parking is available in Visitor Lots 1 and 2 and the Mondavi Center parking structure. 

How? For more information, please call (530) 752-4880 or visit arboretum.ucdavis.edu. 

There. Simple. Less than one page. Easy for us, good for you. Thanks, in advance.

Oh, and if you are a for-profit company: buy an ad. Thanks again.

Monday, April 12, 2010

IMPORTANT: READ BEFORE USE


You may have noticed that more and more retailers as well as manufacturers have expanded their digital advertising. No longer is an e-mail blast the sole digital component of communication between a nursery and its customers. My goodness, who doesn't have a presence on Facebook or Twitter in 2010?

However, there is a dangerous trend in this: many large garden retailers and product manufacturers have outsourced their digital PR work to outside firms; or, to employees who know their way around a computer better than the product aisles.

For example, one large, California-based garden center sent this Tweet out to their followers last week:
"Garden Tip: Do you have bug problems in your garden? Try Sevin Insect Control. It's OK to use on edibles and is environmentally-friendly."

Whoa, Nellie.

Let's read the label of Sevin Insect Control, shall we? 

"ENVIRONMENTAL HAZARDS
This product is extremely toxic to aquatic and estuarine invertebrates. Do not apply directly to water, or to areas where surface water is present or to intertidal areas below the mean high water mark. Do not contaminate water by cleaning of equipment or disposal of wastes.

BEE CAUTION
This product is highly toxic to bees exposed to direct treatment on blooming crops or weeds. Do not apply this product or allow it to drift to blooming crops or weeds
while bees are actively visiting the treatment area.

VEGETABLE CROPS
For control of all the vegetable pests listed below, apply this product in adequate volume to effectively cover both the upper and lower surfaces of the plant. NOTE: This
product is not registered for use on celery and sweet potatoes in California."

The label goes on to state to wait 14 days after use before harvesting Broccoli, Brussels sprouts, Cabbage, Cauliflower, Chinese Cabbage, Kohlrabi, Celery, Collards, Endive (Escarole), Hanover salads, Head lettuce, Kale, Leaf lettuce, Mustard greens, Parsley, Salsify roots, Spinach, Swiss chard,
Turnip tops and Peanuts. Oh, wait a minute: it's not registered for use on Celery in California. Nevermind.

This is the back side of the label. The front side of the Sevin Insect Control label says nothing about being "environmentally friendly" or "OK to use on edibles". And there's a good reason for that: product labels for pesticides are legal documents, binding in a court of law.

And this is why we repeat the mantra, over and over: READ AND FOLLOW ALL LABEL DIRECTIONS.

If you attempted to take the manufacturer or retailer to court because, all of sudden, after using their product, the bees in your yard were found dead, your chances of winning would be minimal. Especially if your defense was, "Their advertising said it was 'environmentally friendly'".

As Trey Pitzenberger, Owner of the Golden Gecko Nursery in Garden Valley, CA pointed out in the April 9th edition of his blog on this topic: " I suppose a vegetable garden sprayed with Sevin is more environmentally friendly than that same area covered in concrete." Chimed in nursery owner Don Shor of Redwood Barn Nursery in Davis: "When carbaryl was introduced in 1956, it WAS environmentally friendly... Compared to DDT."

Again, this was a retailer (or the retailer's agent) making those claims of "environmentally safe", not the manufacturer. It is imperative that you, the home gardener, READ THE LABEL.

==========================================

A blast from another PR agency touted: 
"A Green Revolution is sweeping the country.  Now, more than ever, people are concerned about safety in and around the home landscape.  They are concerned about the food they are eating, where it’s coming from, and about the products used to grow them and it’s not just in the garden where homeowners are concerned.  Lawn care, flowerbeds and landscaping are getting attention too.
For many of us, our lawns and gardens are a source of enjoyment. Our children play on them, we entertain our friends in them and many times, they are the source of the fresh fruits and vegetables we put on our table to share with family and friends.
Sadly, our lawns and gardens, specifically the maintenance of them, can be hazardous to the environment. The average suburban lawn can use up to six times the hazardous chemicals per acre as conventional farming and a gas mower can emit 10 times as much hydrocarbon as a car in one hour of use.
As we become more aware of the damage that is being done to the environment around us, a trend of conscious gardening has emerged."

Ooh, sounds good! Um, exactly what product are you attempting to sell?
..."Products like Clear Choice which used 80% less chemicals effectively kills weeds –right down to the root."


Well, the front label is promising: "Lawn Friendly Weed Remover". But what's that below, in the smaller print?
"Active Ingredients:
2,4-D, dimethylamine salt* 0.0340%
Mecoprop-p, dimethylamine salt** 0.0220%
Dicamba, dimethylamine salt*** 0.0042%"

Hmm, I wonder what the University of California IPM website thinks of that combination of active ingredients for weed control in a lawn?
"...combines 3 active ingredients and controls most broadleaves (weak on oxalis); dicamba products may kill ornamentals if roots are in lawn or drift occurs."

And sure enough, a closer look at the backside of the product label reveals:

"ENVIRONMENTAL HAZARDS
This pesticide is toxic to fish and aquatic invertebrates. This product may adversely affect non-target plants. Do not apply to or near water, storm drains, gutters, sewers, or drainage ditches. Do not apply to areas where surface water is present, or to intertidal areas below the mean high water mark, except as noted on appropriate labels. Do not apply within 25 feet of rivers, fish ponds, lakes, streams, reservoirs, marshes, estuaries, bays, and oceans. Drift and runoff may be hazardous to aquatic organisms in water adjacent to treated areas, and to non-target plants. Do not apply when windy. To prevent product run-off, do not water to the point of runoff, or apply when raining or when rain is expected that day."

But wait, there's more:
"GENERAL PRECAUTIONS AND RESTRICTIONS
• Do not apply this product in a way that will contact any person or pet, either directly or through drift. Keep people and pets out of the area during application.
• Do not allow people or pets to enter the treated area until sprays have dried.
• Do not apply near lakes, streams, rivers or ponds.
• Avoid drift of spray mist onto vegetables, flowers, ornamental plants, shrubs, trees and other desirable plants. Do not apply in windy conditions.
• Do not apply as a fine mist because of potential injury to desirable plants." 

Again, it is up to you to figure out what's best for your yard. 
Be skeptical of the advertising hype. Instead...
READ AND FOLLOW ALL LABEL DIRECTIONS.


Thursday, April 8, 2010

Ants!


     I had plans to rant about a number of personal vexations this week:

• Stores (usually supermarkets and big box stores) that sell cool-season annuals alongside warm-season annuals this time of year; 
• Advertising campaigns for pesticides that claim their products are "natural", "lawn friendly", "environmentally friendly" and "safe to use"...when none of those things are true, after reading the label;
• Weed whacker maintenance.


Instead, taking priority, is...ANTS!
The spring indoor migration has begun. Argentine ants, those busy little black ants, are march, march, marching through the kitchen and bathroom.
In years past, we would reach for the spray can and douse those little scavengers. But not anymore.
 Many of those indoor spray pesticides are only effective with direct contact on the ants. And the stronger sprays, with residual action to thwart the next wave of ants, is potentially harmful to you, your kids, your pets.

So, here is what we are doing in 2010: following the recommendations of the UC Davis Integrated Pest Management Project for Ant Control.
That includes:
• Determine what the ants are attracted to and remove the food source
• Vacuum trails, wipe them with soapy water, or spray with window cleaner
• Locate entry points and caulk openings or plug with petroleum jelly
• Put out bait stations or apply gel bait at entry points
• Baits take time to work so continue to clean up trails
• Indoor sprays are not usually necessary.
• Avoid products packaged as granules that contain the active ingredients cyfluthrin or permethrin. Although these products may be mistaken for baits, they are actually contact insecticides that rapidly kill foragers and do not control the colony.


Before wiping up (or wiping out) the little critters, follow their trail. Note their entry point into the house. Seal it up. We have found ants entering the house in a variety of small avenues: beneath moulding, cracks in the window frame, behind electrical outlet plates...and one of the ants' favorite entries: that large holes beneath the sink where the pipes enter the house.

According to the UCD IPM page on ant control, "If ants can be thoroughly washed away and excluded from an area, an insecticide is probably not necessary. Vacuuming up ant trails or sponging or mopping them with soapy water may be as effective as an insecticide spray in temporarily removing foraging ants in a building because it removes the ant’s scent trail, especially if thorough cleaning is done at the entry points. Some soap products such as window cleaners can kill ants on contact but leave no residual toxicity. Certain plant-based oils are also applied for this purpose, but their odor can be offensive."

Oh, and another lesson we learned the hard way: if you put those ant baits indoors, you will attract more ants inside. Look for ants crawling along the outside of the house, and place the baits there, being sure to follow all label directions.

What about those ant sprays that are intended to be used as a perimeter spray along the outside of the house? Stick with the bait traps, says the UCD IPM page: "Spraying around the foundation will not provide long-term control because it kills only foraging ants without killing the colony. Perimeter treatments may appear to knock down the population, but ants will quickly build back up and invade again. To try to achieve long-term control, some pest control companies offer monthly perimeter spray programs. Perimeter treatments pose more risk of environmental upset than baits in bait stations and are less effective than a bait-based IPM program."

Ant baits are not ant traps, even though it may look like they are stuck there. The whole point of ant baits: they get the stuff on them, take it back to their nest, where they share it with others...and then croak. Be patient. It may take a week or so for the baits to work on the ant nest.

More info about ant baits from the UCD IPM project: "Baits are insecticides mixed with materials that attract worker ants looking for food. They are a key tool for managing ants and the only type of insecticide recommended in most situations. Ants are attracted to the bait and recruit other workers to it. Workers carry small portions of the bait back to the nest where it is transferred mouth-to-mouth to other workers, larvae, and queens and other reproductive forms to kill the entire colony. Bait products must be slow-acting so that the foraging ants have time to make their way back to the nest and feed other members of the colony before they are killed. When properly used, baits are more effective and safer than sprays.

• Sweet sugar baits such as boric acid (use low concentrations with less than 1% of the active ingredient) are highly attractive to Argentine ants throughout the year.

• Protein baits are attractive to ants in spring when colonies are producing new offspring. (Baits like fipronil or hydramethylnon are effective.)


• Place baits in late spring or early summer when populations are low.


• Place baits outdoors; avoid indoor baiting as that may attract more ants into the home.


• Place baits near nests, trails, or along foundations.


• Baits should be placed in protected areas away from children and pets.


• Offer small portions of each bait to see which one is preferred before employing an extensive baiting program.


• Follow up regularly to make sure bait is working and place fresh bait as necessary.


How baits work:
• Worker ants are attracted to the bait and take it back to the nest where the entire colony, including queens, may be killed.


• Bait must be slow-acting so workers won't be killed before they get back to the nest.


• Results may not be evident for several weeks.


• Bait stations or ant stakes are easiest to use and safest for the environment."

Ant baits contain various active ingredients and attractants. We have tried a variety of different ones, to appease the finickiest of ant diners. One of my favorites is one that uses boric acid, a less toxic alternative.

But again, use it outdoors...otherwise, you will be drawing more ants inside.


Monday, April 5, 2010

Recipes for Your Home-Grown Produce


Growing food for your family is easy. Using all that food is hard. This spring and summer, I'll have plenty of blogs about preserving your harvest.
For starters, how about a few of my favorite recipes:


Farmer Fred's Fruit Smoothies 
To enjoy this delicious drink throughout the year, vacuum seal and freeze your excess cherries, mulberries and blueberries. Cut excess pluots and peaches into chunks; seal and freeze. For tender, juicy fruits such as mulberries and cherries, freeze them for about an hour first, and then seal them in bags. That way, there's no squished fruit! Experiment with other fruits, including plums, apricots, cranberries and nectarines!

Add ingredients to a blender:
One cup of your favorite homegrown fruit. My favorites for smoothies include mulberries, cherries, pluots, blueberries or peaches.
One and a half cups orange juice or apple juice.
One cup vanilla yogurt.
One-quarter cup non-fat milk.
One banana.
Six tablespoons soy protein powder (optional).
Blend thoroughly. Refrigerate unused portion.

Makes 40 oz, about five servings.
175 calories per serving.
30 grams carbohydrates per serving.
7 grams protein per serving.

+++++++++++++++++++++++++++++++++++++++++++++++++++++++++++++

Farmer Fred's Fresh Salsa Recipe
 
2 lbs. of very ripe tomatoes (Celebrity and Ace are good choices; paste tomatoes such as Viva Italia and San Marzano have the advantages of ripening at the same time and are easy to peel)
2 to 4 warm to hot peppers (I use moderate heat peppers such as Inferno, Numex Joe E. Parker and Anaheim...and I remove the seeds! And wear rubber gloves!
Don't touch yourself...or people will laugh!)

One-half of a home grown onion (my favorites: Stockton Red, Stockton Yellow)
One-half cup fresh cilantro (remove stems)
2 cloves minced garlic
2 tsp. sugar
2 tbs juice from a fresh lime
Garlic salt (to taste)
Dice the tomatoes. (or use a food processor...very briefly)
Chop the peppers, onions and cilantro in a food processor.
Stir all ingredients, including the garlic, sugar, garlic salt
and lime juice, together.
Makes about 3 cups.

++++++++++++++++++++++++++++++++++++++++++

Farmer Fred's "Sweatin' Up A Storm" Chili
This chili recipe took first place in the 1984 Sacramento Media Chili Cookoff. The Secret? Home grown ingredients, especially the tomatoes, peppers, garlic and onions!
For best results, use paste tomatoes. Recommended varieties: San Marzano, Classica, Viva Italia, Polish Linguisa or Roma VF.

 
3 medium onions (Stockton Red)
2 mild green peppers (Yolo Wonder, Flamingo or Gypsy)
3 stalks celery
3 cloves garlic
1 serrano chili pepper (remove seeds)
1 jalpeno cili pepper (remove seeds)
1 Fresno or Anaheim chili pepper (remove seeds)
For sadists and mosochists only: Leave the seeds in the peppers.
8 lbs chuck, coarsley ground
30 oz. fresh tomatoes (peeled and cored)
15 oz. tomato sauce
6 oz. tomtoa paste
7 oz. diced green chilies (canned)
2 or 3 fresh bay leaves
2 Tbs fresh oregano
4 Tbs fresh cilantro
1 Tbs fresh parsley
1 Tbs cayenne pepper
6 oz. chili powder
1 Tbs crushed cumin seed
12 oz. Mexican beer (You may consume 6 oz. of this directly)
12 oz. spring water
Add garlic salt to taste
Add Tabasco sauce to taste
Dice and saute first seven ingredients. Add meat; brown.
Add remaining ingredients.
Add enough water just to cover the top of the ingredients.
Cook for three hours on low heat. Stir often.
Makes 24 servings. Freezes well. Supply diners with sweatbands.
                 
++++++++++++++++++++++++++++++++++++++++++++++++++++++++++++